Sunday, July 31, 2011

Summer Splash!!! August theme for Paperissues.blogspot.com

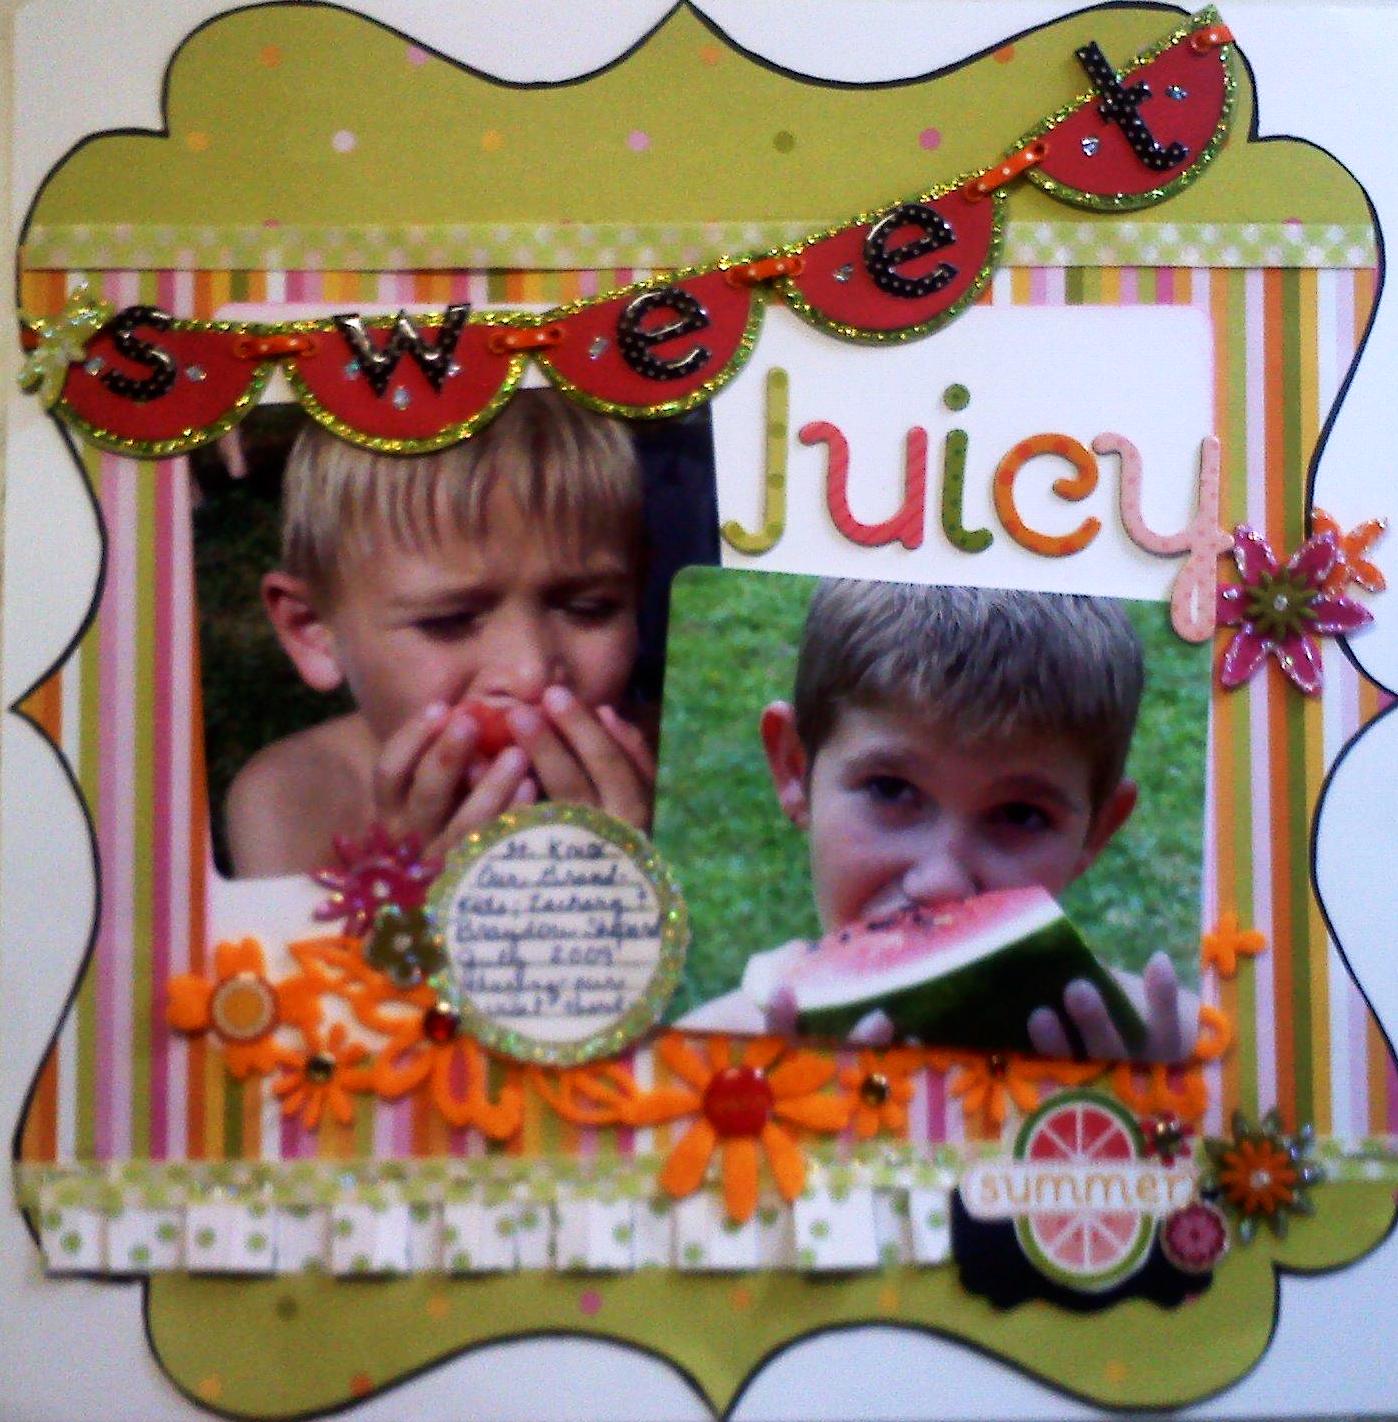
Happy August!!!  I say that almost tongue in cheek because anyone knows that living in the Lone Star state this time of year can feel icky sticky and sometimes miserable. After dealing with over 45 days of 3 digit temps many of us long for the cooler days where we can just enjoy the summer or whats left of it. Here is a layout of two precious grandsons who really know how to cool off. Its not often I do a multi-pic double page layout. I had lots of fun using up my older stash of goodies.Lots of Ki Memories papers and lace die cut, Cloud 9 Epoxy, (Did I mention I love anything acrylic or epoxy?) lots of Ranger Stickles, Karen Foster Card stock sticker, Making Memories paper flowers, and felt flower from stampin up. I added more epoxy and glitter to the chunky acetate alphas too.  My favorite thing was adding the dragonfly made with original sizzix die and more glitter and epoxy. I think its the jewelry on the page..

(Karen Foster cardstock sticker, Making Memories flowers and Stampin up flowers all glittered up)
this sweet This sweet dragonfly was made using the original sizzix die, a dab of stayzon ink on edges of scrap acetate. glitter glue and epoxy sticker dots and a little bit of wire and glossy accents to secure everything.

(Even though I love all things vintage, I also love anything translucent like acryillic, epoxy and glass look)

c

Saturday, July 23, 2011

Christmas in July, (theme for Lions Park thurs craft class at the senior center)

I volunteer at our local senior citizen center as a Paper Crafts instructor.  However July's class had nothing to do with paper crafting. I have to give credit to a sight called crafts by amanda for the wonderful inspiration.  These are ornaments made from light bulbs and baby socks. It is such a simple and rewarding project. Most of the things can be found around the house or found at a local thrift store. 

Materials list: Light bulb, (not the energy efficient kind).  rubbing alcohol, white spray primer, or acryillic paint. I also used some white texture medium by delta coat, but you can use thinned out drywall spackle or texture spray found at most super centers or hardware store.  1 baby sock. (i could only find a pack of white baby socks that I ended up dying with inks.) Fiberfill, you can buy it or reclaim the fill from an old worn out pillow. irredescent Glitter glue, ribbon, black permanent marker. black 2inch piece of pipe cleaner or wooden tooth pics. small 1/2 inch piece of orange pipe cleaner.  ribbons and buttons for embellishment. piece of scrap fabric and 6 inch piece of ribbon or silver/gold cording, jute cord would work too. glue gun and sticks. tacky glue will work too. 2EA.- 1/4" size of white balls.. you can find these on ball fringe or piece of cotton would work too. 

Directions: 
1.wipe light bulb with rubbing alcohol and let dry. 2.Then give several light coats of white paint. dont worry about the screw part that will be covered. 3. I added texture medium and pounced it on with stiff brush. Let it dry. 4.Next squirt some glitter glue on a plate and use a brush to wipe all over the dry bulb.  set aside to dry. 5.Next cut ankle part of sock, (ribbed part) straight across.  6.Take your 6"piece of gold cording/or ribbon. and tie the cut end of the sock closed with the ribbon. knot the 2pieces of ribbon together to form a hanger. This forms the beanie hat and the hanger. 7. Next, gather very small amount of fiberfill, (about the size of a small pecan), and stuff it into the hat. Turn the rim of the hat up and use glue gun to glue the inside edge of that hat to cover the screw part of the lightbulb you may have to keep working the fiberfill in..Note!!! If too much fiberfill adjust and remove some to suit your taste.  8.Next take a 1-2" rectangle of the other piece of sock, the inside terry cloth part. and wrap it around a small pinch of the fiberfill. Roll it closed like you would with a burito. Seal edge with glue. Make sure you face the seam side towards the belly. 9. Next bend two pipe cleaners so that they look like arms with elbows. I put a slight curl on the pipe cleaner where the shoulder will be. I do this so i can get a flatter surface to glue the arms to the body. 10. Next I poke the hand end of the pipe cleaner into the muff. I seal the edges of Muff around the wrist area of pipe cleaner. I try to make sure no stuffing is popping out. 11. Attatch a thin strip of tattered fabric scrap and tie loosely around neck, draping and overlapping the arms. I glue the fabric at the back of the neck and just a few spots on the ends of scarf. I also glue the seam side of the muff to the belly area. 12. Now you can add the eyes with a marker. space them and allow enough room for the nose. You may want to do the nose first.  13.To add the nose. I folded the small piece of orange pipe cleaner in half. and I glued cut pipe cleaner ends to face. 14.I also glued two small white fringe balls for the ear muffs at where the ears would be.  15.The last few steps are to glue two buttons to the belly and if you want to add more embellishment to the hat or scarf. you can add ribbon, sequins, buttons..endless ideas...  

I really hope you will try this. If you do, please upload your creations and ideas. I would love to see what you do with this. 

Her is a close up view.

Friday, July 15, 2011

Our Memories of Fredricksburg (clear scrapbook mini album)

Its a Sweet Life...the theme for Paperissuesblogspot.com.


The pics don't do it justice. I wish I got a pic of the roomy comfy furniture in the living room. 


to the left I made mini flip card inserts of the wonderful murals. These murals were so realistic and gorgeous.


This funny lil' rooster was following me around at the Inn as I was attempting to take pics of the place. I called him the grounds keeper.

This is the front cover up close:
This months theme is Sweet Life at paperissues blog. I chose to do a mini clear acetate album using Dena designs kit.
Note: (I added some Prima notecards: flowers, Stamps from stampabilities:deadbeat designs, Papers other than from kit were scraps from: Me and my big ideas, Paper Studio, Stamping Station.  Punches: Martha Stewart, Ek success.)
Having 7 children over the years left very little time or money to enjoy each other as a couple. Now that the kids are older, we can take off for a mini vacation enjoying the Sweet Life together as we explore each other and our dreams. We love visiting old rustic bed and breakfasts or anything vintage. Our dream is to one day have a big barn in the country and convert it for rustic country wedding hall.
As you check out my pages don't forget to peek at all the wonderful talent at paperissuesblogspot.com
You might want to go check out http://www.etsy.com/shop/paperissues and take a peek at:


More kits in the Paper Shop!
You can still take advantage of the CHA sale by using the code CHA30.
30% off!
Woot!

Tuesday, July 5, 2011

Patriotic Party Favors.

This is a fun project you can make with items found laying around the house.  The first project is a Patriotic Centerpiece.

Materials
 1)Paper towel tube
2) left over empty ribbon cardboard spool, (1 small and 1 larger).
3) Mod Podge
4) eyelets and eyelet setter, (optional)
5) patriotic papers
6) ribbons, raffia, moss, wire. jute cord=(thin)
7) buttons, and other patriotic embellishments
8) glue gun and sticks.
9) twill. or ruffle lace.
10) sand paper, ink, craft stick.
11) Rangers Inkessentials Crackle accents.
First thing you do is gather your papers. cut papers the length you need for the tube. apply Mod Podge to both outside of tube and back of paper. smooth air bubbles with a craft stick.  Next, cover the two empty ribbon spools with paper the same way.  on the bare sides where ribbon normally lays flat around the spool, you can Mod podge thin paper strip or ribbon around it. Let dry. sand edges if needed with emery board. Ink them if you like.  Glue gun the ribbon spools together. Next Glue gun the tube on top of the tiered spool. Add ruffle ribbon around bare flat edges of spool as seen in the pic.
Most of the papers and products I used was from an older Line of K&Company and and older laser cut die cut, (USA). I gave it the crackle look with Rangers Inkessentials Crackle accents., (love this product).. You can opt not to do this and make it your own. Some of the Chipboard is from an older Lil Davis Line.

Now is the fun part! Embellishment! I like to take old cardboard that comes with paper packs. Thicker is preferred.  Find paper that you like and trace or punch assorted sizes of stars in assorted colors and patterns. Mod Podge the papers to cardboard. Do one side at a time. Don't worry about trimming excess paper til both sides are dry. Now you can sand and ink them. Add buttons, eyelets and wire.. String a few with jute around the pole and have some bursting out of the center piece with wire. To keep the wire in place, first use heavy gage wire or even kabob sticks and a piece of styrofoam wedged down in the hole. You can cover the ugly part of the hole with moss or cellulose.  Add other embellishments and use a glue stick or pop dots to attach them.

Monday, July 4, 2011

Recycle a bowling ball and make a beautiful Gazing Ball for your yard!!!

As Spring arrived, I wanted to add some yard art to my garden. After looking at the price of Gazing balls, I decided to do a search online for Yard art made from junk. I found several places showing recycled bowling balls. This is a very easy project to do. It will take a few days since only one surface can dry at a time.

Materials you will need:  1. Old bowling ball, roughed up, washed and cleaned with vinigar.
                                      2. half round marbles found at the floral dept. or any dollar tree.
                                      3. Clear silicone exterior, (outdoor), window caulk.
                                   
                  place ball in an old coffee can to support it. (big can). Then apply silicone to flat side of marble. only work on top surface. cover approx. 1/4 of ball. press marbles down firmly. Let dry  for 24 hours then rotate to a different spot. dont worry about the holes. You can either mount the hole over a rod for the ground or lay holes face down on a pedastal after you have finished it. Try to fit them as closely as possible. if the small gaps bother you then fill them with things like small rhinestones or glass beads.  It shouldn't take more than 4 or 5 bags of marbles to complete the project. It is important that your ball be similar in color to the marbles.  If you want, you can paint the ball with primer. Make sure you sand it well with sandpaper and clean residue off with rubbing alcohol or vinegar. Now you can add any color of marbles and your colors will show true. (I kinda like using the natural marble of the ball to show through the translucent marbles.

Some ideas to try: Mosiac the ball with broken china and grout, mosiacs from hobby store, stones, shells, glass beads or mixture of both set in grout.

Next time your at a yard sale or thrift store and see a ball, go ahead and get it and give this a try. If you can glue, and do a easy puzzle then you can do this.

A collection of my favoritesboth past and present

Here are some of my favorite scrapbook pages/ and crafts from over the years